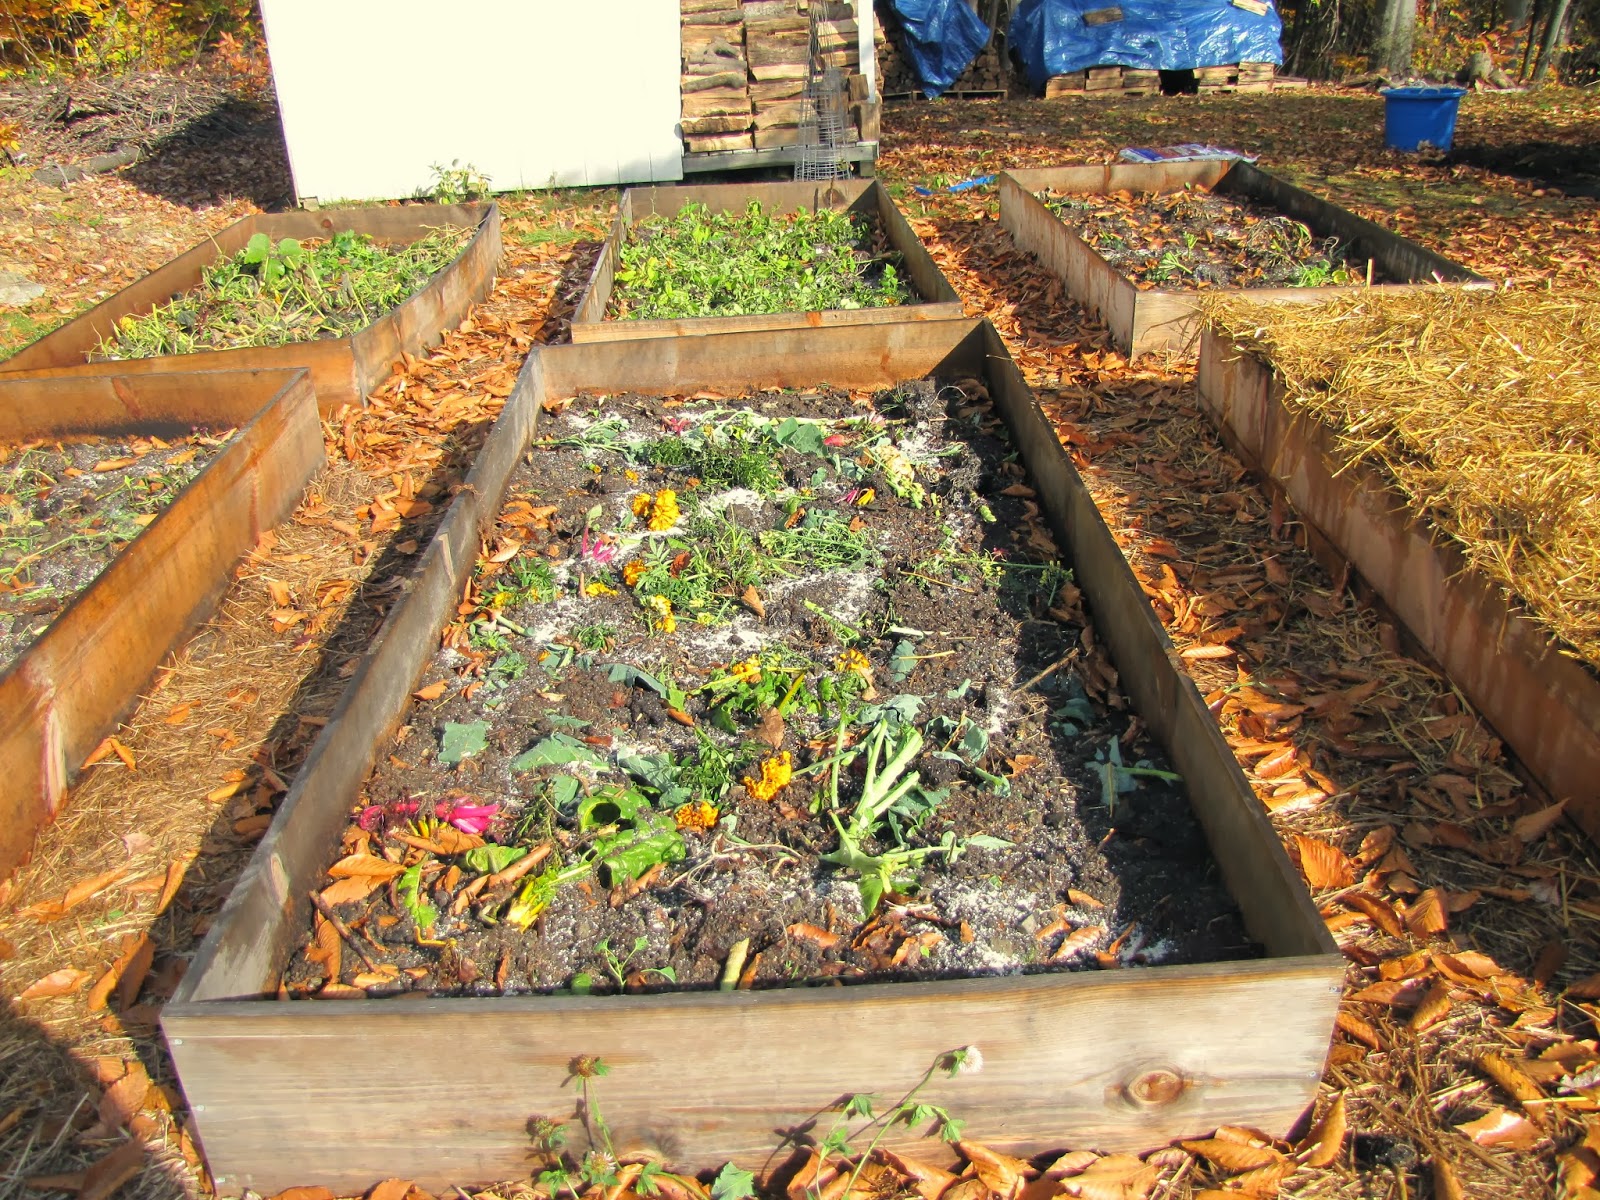
As we are well into autumn, and our second baby is due any time now, we made sure to take care of the dry sunny weekend days we had last month and put the garden "to sleep" for the winter. As a reminder, our raised beds were created this spring, as we only moved into our house last winter. So these gardens were very new and didn't have much time to "cook" (or decompose into soil) before we planted in them. Despite that, we still managed to have a decent harvest this season. You can see how we assembled these beds originally here: Post about assembling our lasagna style raised beds. One thing we weren't happy about after assembling our beds this spring is that we ran out of resources to fill them as much as we would have liked. So this fall, we decided to top them off with all sorts of goodies so that they would be nice and full for next spring. Here's what we did (note that at the end of most steps I indicated if this was a carbon or nitrogen rich layer as a reference for when you assemble your own raised beds):
1. First we collected the last of the veggies.
2. Then I chopped down/pulled out all of the plants. For the stawberry plants, I was careful not to pull out any roots, and just cut them down so they were less than an inch high. For the rest of the beds, I mainly pulled plants up and broke them apart into smaller pieces, leaving the plant matter in the beds to return nutrients back to the soil. I left some roots intact to maintain a little of the soil structure. (Nitrogen)
3. We sprinkled bonemeal over each of the beds, which is an excellent source of phosphorous. This is very beneficial for the strawberry plants in particular.
4. Next we spread out the rest of the matured horse manure we had from the spring as a compost layer. (Nitrogen)
5. At this point, we wanted to cover the strawberries up as we didn't
want to make a bunch of new soil on top of them. So we covered them with
a bale of straw (which ended up being about 6 inches deep) to protect
them from frost. (Carbon)
6. For the remaining 5 beds and our little teepee, we added several more layers of mulch in hopes of creating a rich soil to plant in this spring. First we added 4 bags of chopped, dead leaves to each bed. Note that after each layer of mulch, I watered the garden thoroughly to help weigh the materials down and kick start the decay process. (Carbon)
7. Next we added a layer of seaweed that we collect off the surf on the beach. Remember, at least here in Maine, it is illegal to harvest live seaweed without a permit. You must collect the stuff that washes up on the surf, and you want to avoid any that is already starting to rot. Going to the beach after a storm is a great time to collect seaweed. Once home, make sure you thoroughly rinse off the seaweed so that you aren't introducing a lot of salt into the garden. Salt will leach nutrients from the soil. (Nitrogen)
8. We added another 2 bags of chopped leaves to each bed, since we have so many readily available. (Carbon)
9. Next we distributed a couple buckets of wood ash collected from our family's wood stove. Wood ash contains potassium (or potash) which is a valuable nutrient for crops. (Carbon)
10. We bought a couple bags of organic Coast of Maine brand potting soil to sprinkle on the top of the beds. This potting soil contains peat and organic compost, and will allow for the seeds to have a nice texture to be planted in next spring if the other layers aren't well broken down yet. (Nitrogen and Carbon)
11. Finally, we topped each bed, and around the teepee with straw as a weed-blocking and insulating layer. In the center of the teepee, we laid down a bag of Coast of Maine brand Dark Harbor Blend Enriching mulch in the middle of the teepee so that it will be a little more pleasant to sit down on this coming spring. (Carbon)
Hopefully we will have an even more successful garden next spring now that the beds are nice and full and will have time to decompose a bit over winter. I hope that you all had excellent success with your gardens this summer, and if you didn't get around to making a garden, you still have plenty of time this fall to make a bed or two. When assembling your own raised beds, remember that you do not need to use the exact ingredients we used. You can use whatever resources are more readily available to you...the important part is that you use a mixture of carbon and nitrogen rich layers.
A novice's dive into the world of permaculture. Beginning with a blank slate, follow my journey as I attempt to convert my new home from a biodiversity desert to a nature lover's sanctuary.
Showing posts with label Pea Teepee. Show all posts
Sunday, November 10, 2013
Tuesday, July 30, 2013
Pea Teepee
This spring, while we were putting together our raised beds, we also decided to make something that our one year old son might enjoy during the summer: a pea teepee. I got the idea from a farm I worked at that used to have kids make a pea teepee as part of their April Vacation Camp. It is just a nice, sheltered area that kids can crawl into and be hidden from the sun while munching on healthy snacks.
To construct it, we did a bit of frame-less lasagna gardening. We spread out some rotted horse manure, but down a weed block layer of paper products, then added a bit more manure to encourage all the worms and helpful insects to work their way to the surface. Then we added a few layers of whatever we had to spare to build a soil layer. We put down leaves, a bit of seaweed, some peat moss, and potting soil since we didn't have much to work with. Finally, we topped it off with a weed block layer of organic bark mulch.
The actual teepee was constructed using some tall (maybe 7 or 8 feet tall), straight sticks we found in our yard. We tied them together at the top with twine, and then securely buried the ends in our little circular lasagna garden. I then went around and secured the sticks together with twine, making sure to leave an entrance. I went around the teepee several times at about one foot intervals. Then, in-between the sticks, I added some twine vertically so that the pea plants would have something beside the sticks to climb up.
Since peas love cooler weather, we planted pea seeds right away. I made little pockets in the mulch with potting soil and planted them all around the teepee. After about two weeks, we started seeing our first little sprouts.
The sprouts were not coming in evenly though, so I went ahead and planted another round of seeds to fill in the gaps. Those came in much more successfully, and soon our teepee was surrounded by young plants.
Everyday, my son enjoyed running into the teepee while I watered the peas. The pea plants grew full and healthily, but they never got as tall as I had hoped they would. In the end, when they started flowering and producing pea pods, I don't even think they had climbed two feet up the teepee. I was rather disappointed because this didn't create the little hideaway I had been hoping for, but my son still enjoyed playing inside, and loved snacking on peas with me on those early summer days.
In mid July we harvested the last of the peas. Some of the plants were starting to shrivel up, and they weren't producing any new flowers. My son and I had fun picking the last of the peas, shelling them out on the grass, and munching on fresh peas. I then pulled up all the plants and laid them around the teepee to start decomposing and put nutrients back in the soil for next year.
Next year I will have to do a little more research before purchasing my pea seeds. I need to make sure I find a variety that grows tall so we can fill out the teepee a little bit better. I might even end up trying something other than peas depending on where my research leads me.
To construct it, we did a bit of frame-less lasagna gardening. We spread out some rotted horse manure, but down a weed block layer of paper products, then added a bit more manure to encourage all the worms and helpful insects to work their way to the surface. Then we added a few layers of whatever we had to spare to build a soil layer. We put down leaves, a bit of seaweed, some peat moss, and potting soil since we didn't have much to work with. Finally, we topped it off with a weed block layer of organic bark mulch.
The actual teepee was constructed using some tall (maybe 7 or 8 feet tall), straight sticks we found in our yard. We tied them together at the top with twine, and then securely buried the ends in our little circular lasagna garden. I then went around and secured the sticks together with twine, making sure to leave an entrance. I went around the teepee several times at about one foot intervals. Then, in-between the sticks, I added some twine vertically so that the pea plants would have something beside the sticks to climb up.
Since peas love cooler weather, we planted pea seeds right away. I made little pockets in the mulch with potting soil and planted them all around the teepee. After about two weeks, we started seeing our first little sprouts.
The sprouts were not coming in evenly though, so I went ahead and planted another round of seeds to fill in the gaps. Those came in much more successfully, and soon our teepee was surrounded by young plants.
In mid July we harvested the last of the peas. Some of the plants were starting to shrivel up, and they weren't producing any new flowers. My son and I had fun picking the last of the peas, shelling them out on the grass, and munching on fresh peas. I then pulled up all the plants and laid them around the teepee to start decomposing and put nutrients back in the soil for next year.
| pea plants laid around to decompose |
Next year I will have to do a little more research before purchasing my pea seeds. I need to make sure I find a variety that grows tall so we can fill out the teepee a little bit better. I might even end up trying something other than peas depending on where my research leads me.
Subscribe to:
Posts (Atom)