Tuesday, April 30, 2013

Making the Raised Beds Lasagna Gardening Style Part Two: How?

Now that I've gotten the background information about why we chose to make our garden lasagna style out of the way with Part One (Please click here to read it if you haven't already), we are ready for the fun part: making lasagna gardens! Just a couple things before I go into the step-by-step of what we did. First of all, the ideal time of year to start a lasagna garden is in the fall, that way the layers have time to "cook" (the ingredients can begin to break down/compost). However, we didn't move into our house until December when it was already too late to put in a garden. Plus, I needed some time to just observe our yard so I new where the ideal location would be for us. Ideally, you want a flat area that gets a lot of sun at all times of day. I thinking observing where the snow melt from our yard first was really helpful in figuring out the best location for us. Starting a lasagna garden in the spring is perfectly fine too though. If you are able to start it in early spring like we did, you can throw some black plastic over the beds for several weeks to begin the "cooking" process. But if you don't have time for that, it is perfectly fine to plant straight into the beds the day you make them. Just keep in mind that if you are planting seeds, you will need to plant them into little trenches of extra peat moss, compost, or even potting soil. You also might consider holding off on root vegetables if you started in the spring.

The second thing I want to address is that we are novices; this it the very first time my husband and I have done sheet mulching in our garden and we really have no idea if it is going to work out as wonderfully as we imagine it is going to. So when you read through this step-by-step as you are making your own garden, just remember that this is by no means written by an expert or even by someone with experience. I have taken a lot of time to read through Gaia's Garden, Lasagna Gardening and a handout I got from a permablitz I participated in (where we assembled raised beds and filled them lasagna gardening style) to gather all the information I needed to assemble or garden. According to all theses sources, our garden should be brilliant. Even so, I feel obligated to warn you.

Finally, the ingredients I've used in our lasagna garden certainly not the only things that can and should be used in your garden. One of the benefits of creating a lasagna garden is that you can be creative with ingredients based on what you have access to. So, after I go through the steps on how we made our personal garden, I will briefly list suggestions I've found from my sources of other materials that you may consider using. Don't worry, lasagna gardening is very forgiving, you just have to keep a couple things in mind and I'll address those at the end of the post.

So now, without further ado, here is how we assembled our very own raised beds.

1. Choose a location and test the soil. We bought a cheap and quick soil testing kit off of amazon. I've heard that theses tests aren't always accurate for anything besides there pH test, which was fine with me because that's all I was really interested in. I figured we would be making our soil from all sorts of goodies and the rest of the results didn't matter as much.  I did two pH tests to make sure I got similar results, and both bordered around neutral. If it had been acidic, I would have added lime as my first ingredient to our beds. If it had been too alkaline, I probably wouldn't have added anything because I guess composting and mulching help alleviate that problem. I've read you can add sulfur if you really want to lower that pH.


2. Assemble the raised beds. You can be creative with shapes and materials here. We thought about making a big keystone bed, but it was too complicated with wood and rocks would be too expensive. So we decided to make traditional rectangular beds. If you make a rectangular bed, make sure that it is only 3-4 feet across so you can reach into the middle of the bed without stepping into it. We made 6 beds all measuring 4x10 feet. The beds need to be at least 6 inches deep; 10-12 inches if you plan on planting lots of root vegetables or have very poor initial soil.  Our boards are all 12 inches wide. We used cedar boards, which are ideal as cedar is very rot resistant. You do not want to use treated lumber because the chemicals will interact with your soil (and your food!). Other, less expensive non-treated lumber may be okay but eventually they may rot and fall apart. So if you are thinking long term, go with cedar. The only other thing to note is that you should use either stainless steel or coated outdoor screws. These will prevent them from rusting into your bed and all over the frames once they get wet. Once the beds are assembled, place them where you plan on keeping them. Make sure you leave paths in-between. You can get away with foot wide rows, but we went with two-foot wide rows so that we had plenty of squatting room and for the wheel-barrel to go through. Finally, you need to make sure your raised beds are level.


3. Add trace minerals. We used a compound called Azomite.

Azomite is a natural product mined from an ancient mineral deposit in Utah (USA) that typically contains a broad spectrum of over 70 minerals and trace elements, distinct from any mineral deposit in the world. Azomite is used internationally as a feed additive and a soil re-mineralizer for plants. Azomite trace minerals have been reported to improve root systems, yields and general plant vigor in a variety of field crops and garden vegetables. Available for a variety of applications, Azomite can be used to remineralize nutrient-depleted soils and is OMRI Listed for certified organic production.
I found out very recently that a local alternative (since Azomite needs to be shipped from Utah) is to contact quarries and ask for granite dust. At this point, you also want to loosen up the sod a bit just be poking at it with a hoe. Don't till it (scoop up and turn the soil), you just want to open up the sod a bit. We didn't bother with this step because the sod got broken up when we leveled the beds and we didn't have much grass to begin with.


4. Sprinkle on a little layer of manure. This will help to encourage all the invertebrates you need to come up and compost to your lasagna garden to make their way up to the surface. Water your plots after this (and every step).


5. Put down a weed block layer. This can be lots of wet newspaper, or if you have a very weedy are use cardboard boxes. Make sure you don't use the shiny newspaper pages and to take off all the tape and staples from boxes. You do not want any bare earth exposed, so fill in the gaps well, and be sure to cover all of your paths too. When you are done, soak the paper/newspaper down well.


Filling in gaps

6. Make your beds level. You should have already done this once, but adding the cardboard may have shifted things and from now on they shouldn't really be moving. You may need to stack extra boxes under certain sides to get them level. This is important because raised beds are very good at holding water, and if they aren't level that water is going to pool all on one side.


7. Add an inch or two of rotted manure. We are fortunate enough to have friends who own horses and were able to get a truck load of 1.5 year old manure. It is perfect. Water well!


8. Add several inches of chopped leaves. We borrowed a leaf blower from our parents and used that to chop bagfuls of leaves at a time. Since we didn't do this ahead of time, this actually ended up being the most time consuming step. We put in 4 bags of chopped leaves into each bed. Then watered well!


9. Add a layer of seaweed. A friend of mine helped me to collect a 20 gallon bucket full of rockweed that washed up on the shore. You should not harvest live seaweed, as this practice is unsustainable and damages the ecosystem. Rather, you should try to collect freshly washed up seaweed from the shore after a storm. You don't want dried up and rotting seaweed. Make sure when you bring it him you wash it with sweet-water, otherwise the salt will leach all the nutrients from your soil. I just used one bucketful divided among 6 beds, but really I should have used a bucketful in each. Make sure to water this layer too.


10. Add a couple inches of peat moss. This is a great step forward to creating a nice humus layer in your garden. Peat moss can absorb tremendous amounts of water. It's easiest to work with if you get it wet first, otherwise it's like dust and flies everywhere. Water this layer very well.


11. Add an inch or two of compost. The only compost we have at home is the ones in our worm bin. There was not nearly enough compost in there to spread over the six beds. So instead we had to go out and buy some. We ended up buying 12 sq foot bags of Coast of Maine compost (6 bags of the Quoddy Blend Lobster compost and 6 bags of the Shoodic Blend Cow Manure Compost). The Coast of Maine brand is fantastic as it is all organic and made locally. We spread one bag of each type onto each bed, then watered.


12.  Our last layer was another weed-block layer. Here you can use straw if you want or bark mulch. We chose to buy the Dark Harbor Blend Enriching Mulch made by the coast of Maine. It is a very fine mulch that doesn't rob plants of nitrogen (as many mulches do) yet still able to maintain moisture and insulate the soil.  I especially liked using this mulch because I think it will be much easier to start seeds in then a thick layer of straw. Be sure to water well.


13. Mulch the paths. Initially we planned on using the bark mulch on the paths too, but this year it was not in our budget so we went with the less expensive option of straw. If you go this route keep in mind that you want to use either straw or rotted hay, as hay will sprout and give you lots of weeds which defeats the purpose.


14. Finally, if you assembled your raised beds in late winter/early spring like we did, you might want to put down plastic over the beds to "cook" them. The black plastic will soak in the sun's rays and help the garden to heat up and start to compost more quickly. If you do this for about 6 weeks, supposedly you will have some pretty decent soil to work with.


So there you have it: how we made our very own lasagna gardens. We had hoped to fill them up to the brim, but we were pretty limited in free resources, and are struggling financially so we had to just do our best and hope it is good enough. In future posts I will talk about what we are planting and where, and other interesting things like that. But for now I will end this post with a note about other materials you can mulch with if the materials we used aren't readily available to you.

Lasagna gardening is supposedly very forgiving and you can use a whole bunch of ingredients or just a couple and it should work just fine. The only thing you should keep in mind is that you want to keep between a 100:1 and 30:1 Carbon to Nitrogen ratio. According to Hemenway in Gaia's Garden:

In general, Green materials, such as grass clippings and fresh plant trimmings are high in nitrogen. Brown items, such as dried leaves, hay, straw, and wood shavings, are high in carbon. The exception here is manure, which although brown, is high in nitrogen. Mixing roughly half green with half brown approximates the ideal C:N ratio (Hemenway pg. 83).

If high-nitrogen materials are scarce, sprinkle in some bonemeal or blood meal. Here are some mulching materials you might consider divided into Carbon and Nitrogen rich categories:

Nitrogen Rich
Clover
Compost
Fish scraps
Grass clippings
Manure
Seaweed
Fresh Hay (only use in deep layers so it doesn't sprout weeds)
Salt Hay

Carbon Rich
Dried Leaves
Hay
Sawdust
Straw
Grain hulls
Wood ash
Peat Moss
Wood shavings

Most importantly though, remember that there are many ways to go about sheet mulching, these are just suggestions I've gathered from my research. Have fun, be creative, and experiment! Hopefully our experiment works out okay this year!

Friday, April 26, 2013

Making the Raised Beds Lasagna Gardening Style Part One: What and Why?

Spring has sprung, and our family has been busy little bees preparing our garden. In the past, while living at our in-laws house we have had more traditional garden beds; the type you need to til and plant in tidy rows. But in reading Gaia's Garden: A Guide to Home-Scale Permaculture by Toby Hemenway, Lasagna Gardening by Patricia Lanza and from our own first hand experience at a permaculture blitz, we decided that we were going to try making raised beds at our home instead. Not only that, but rather than just fill the beds with soil, we were going to attempt to try lasagna gardening, or sheet mulching instead. Now you may be wondering what some or all of those terms are, and why we are doing things this way, so before I go on to tell you how, I am going to tell you what and why.

What are raised beds?

Raised beds are a form of gardening where soil is raised from the surrounding soil. The soil is usually enclosed by a frame such as wood, rocks, or concrete blocks. Plants are able to be planted closer together and the beds are made narrow enough so it's unnecessary to have rows within the beds; creating more space for plants.

Why make raised beds?

1. Raised beds are space savers because less space needs to be devoted to paths
2. You don't have to remake them each spring
3. You don't have to walk on the planting bed which means the soil isn't compacted (compacted soil makes it difficult for roots to penetrate)
4. You don't have to bend down as far to work in the garden
5. Raised beds create well designed, active planting areas
7. Easier to plant in guilds: groups of plants that work in harmony with one another
8. Raised beds extend the planting season because the soil warms up faster
9. Generally result in higher yields than conventional gardens
10. Simpler and tidier place to do lasagna gardening/sheet mulching

What is lasagna gardening? 

"Lasagna gardening is a nontraditional, organic, layering method you can use to create better soil while keeping your gardens neat and attractive. (The name comes from the layers you'll be making to create your beds) Based on a commonsense approach and ready available natural ingredients, lasagna gardening is an easy, time-saving way to install and maintain any kind of garden without removing sod, digging or tilling). Close planting and generous mulching greatly reduce the time needed for watering and weeding" (Lanza pg. 2).
Essentially, lasagna gardening is stacking layers of mulch on top of the soil which will slowly decompose into a rich and healthy soil that plants will thrive in.


Why do lasagna gardening?

1. No tilling involved
2. It's a method of eradicating weeds without herbicides or having to weed
3. Helps to conserve water
4. Keeps soil cool in hot weather
5. The mulch agreeably rots down into rich compost; essentially you are composting in place
6. The soil organisms that are essential for ferrying nutrients to plant roots, aren't disturbed. Plants thrive in this rich, intact ecosystem.
7. Sheet mulching is forgiving (you don't have to be exact with your methods to be successful)
8. Can be done anywhere. That includes on rooftops and on pavement.
9. Sheet mulching is a fast and easy way to boost organic matter and soil life to prodigious levels; your garden will support a diversity of plants, beneficial insects and wildlife
10. It saves work, energy, time and money

(Hemenway pgs. 81-82, 85-87, 90) and (Lanza pg. 2)

So, what's wrong with tilling (conventional gardening)?

Finally, you may be wondering, what's wrong with tilling anyways? That's how most farmers do things isn't it? Well, Toby Hemenway describes the problems with tilling so beautifully in his book Gaia's Garden, that I am just going to directly quote his wonderful explanation.

The invention of the plow ranks as one of the great steps forward for humanity. Farmers know that plowing releases locked-up soil fertility. Plowing also keeps down weeds and thoroughly mingles surface litter with the soil. We do all this too, when we drag our power-tiller out of the garage and push the snorting beast through the garden beds in a cloud of blue smoke.

What's really happening during tilling? By churning the soil, we're flushing it with fresh air. All that oxygen invigorates the soil life, which zooms into action, breaking down organic matter and plucking minerals from humus and rock particles. Tilling also break up the soil, greatly increasing its surface area by creating many small clumps out of big ones. Soil microbes then colonize these fresh surfaces, extracting more nutrients and exploding in population.

This is great for the first season. The blast of nutrients fuels stunning plant growth, and the harvest is bountiful. But the life in tilled soil releases far more nutrients than the plants can use. Unused fertility leaches away in rains. The next year's tilling burns up more organic matter, again releasing a surfeit of fertility that is washed away. After a few seasons, the soil is depleted. The humus is gone, the mineral ores are played out, and the artificially stimulated soil life is impoverished. Now the gardener must renew the soil with bales of organic matter, fertilizer, and plenty of work.

Thus, tilling releases far more nutrients than plants can use. Also, the constant mechanical battering destroys the soil structure, especially when perpetrated on too-wet soil (and we're all impatient to get those seeds in, so this happens often). Frequent tilling smashes loamy soil crumbs to powder and compacts clayey clods into hardpan. And one tilling session consumes far more calories of energy than are in a year's worth of garden-grown food. That's not a sustainable arrangement.

Better to let humus fluff your soil naturally and to use mulches to smother weeds and renew nutrients. Instead of unleashing fertility at a breakneck, mechanical pace, we can allow plant roots to do the job. Questing roots will split nuggets of earth in their own time, opening the soil to microbial colonization, loosening nutrients at just the right rate. Once again, nature makes a better partner than a slave (Hemenway pgs. 81-82).

Conclusions

As you can imagine, conventional gardening has lead to lots of problems, especially with large scale farms. Thousands of acres of land have been leached of nutrients and pumped with chemical fertilizers to grow fantastic monocultures to feed the masses. Conventional gardening in our own gardens can be just as harmful to the precious ecosystem that cradles your home. With lasagna gardening, you have to do hardly any work while the benefits are substantial. And if you feel overwhelmed by the idea of trying something completely different than what you are used to, don't! This was my first year doing it and I found it to be both easy and extremely satisfying. Plus I already think our garden looks amazing; even without any plants growing in it yet. So please stay tuned because in my next post I will explain how we created our raised bed lasagna gardening style.

Friday, April 5, 2013

About our first birdfeeders and seed: Tube feeder and Suet

I will admit, not a lot of decision making went into what we used for our first feeder; it was simply what we had available. When we lived in the city, we chose this beautiful tube feeder to hang on our balcony as I heard tube feeders are great for attracting finches, chickadees and other small birds. Unfortunately, the only birds we ever managed to attract in the city were flocks of house sparrows and pigeons. Nonetheless, the feeder held up great and seemed to work well for the sparrows. Now that we live in a rural area, the feeder has seemed to attract a greater variety of species. It's main visitors are black-capped chickadees and goldfinches, but the nuthatches and a tufted titmouse have also investigated.

Black-capped chickadee at the tube feeder

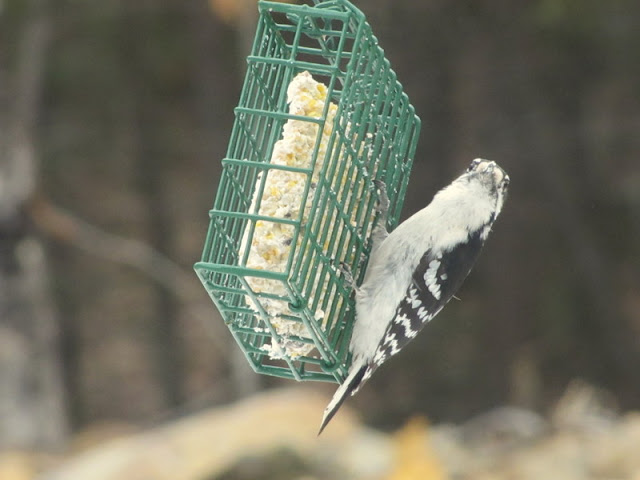
After having just the tube feeder out, I decided I wanted to balance it out with a completely different type of feeder. I chose to pick up a wire cage to fill with a block of suet. Suet is animal fat that is usually covered in a assortment of seeds, nuts and/or fruit. Almost all birds will eat suet. Since their metabolism is very fast, birds never have to worry about eating too many calories, thus the numerous calories supplied from solid suet helps birds conserve precious energy. This is important because birds use up a substantial amount of calories flying around searching for food (Roth, pg. 232). Our suet feeder has been a hit so far; we've attracted hairy woodpeckers, downy woodpeckers, nuthatches, tufted titmouse, and chickadees so far.

Nuthatch enjoying some suet

Now you may be wondering, what about the cardinal, juncos, and mourning doves that I've photographed at the feeder as well? Well, juncos and doves like to eat on the ground, so they have been content pecking at the seeds and bits of suet that other birds (and squirrels) have knocked from the feeder. As for the cardinal, I think we just got lucky. The poor gal came to the feeder in search for seed, but was only comfortable perching on the railing pecking at scraps of seeds that had fallen out. Unfortunately our feeders do not really support larger/less acrobatic birds like her. So soon, we will be investing in an additional feeder or two to attract a larger variety of species. We will probably be getting either a hopper or tray feeder (I'll tell you more about those once we see them in action, but both support both large and small birds).


Perhaps even more important than the choice of feeder is the choice of seed. Honestly, I don't know how picky the birds are about quality. But I care a great deal for our feathered visitors, so I spent a long time selecting a good for them, and one that wouldn't leave a lot of wasted/rejected seed. In Sally Roth's book, Attracting Birds to Your Backyard, she gives some great advice for birdseed selection. She says, for simplicity's sake, and to stick to a reasonable budget, she usually fills her feeders with black oil sunflower and white millet. These seeds appeal to a lot of different birds and are very nutritious. But then she then goes on to discuss how fun it is to make your own mixes to suit the birds in your garden. Here is the general recipe that she uses that appeals to many kinds of birds:
  • 10 scoops black oil sunflower seed, 
  • 5 scoops millet, 3 scoops cracked corn, 
  • 2 scoops safflower seed, 1 scoop flaxseed and 
  • 1 scoop untreated grass seed (Roth pg. 48).
Personally, I liked the idea of coming up with a mix, but I wasn't really sure what would work in our garden yet (as we are starting from nothing), and I didn't want to invest in lots of storage containers to keep all the different bags of seed we may or may not use. So I opted to try out a birdseed mix from the store. I took Roth's advice though and "read the label carefully to make sure the mix contained a high percentage of desirable seeds like sunflower, safflower, millet, canary and flax and a very low percent of fillers, like cracked corn, wheat kernels, and milo". Ingredients are listed in order by quantity, so if fillers are near the top of the list, go with another brand. (Roth pg. 50). 

I finally found a mix I was happy with that was reasonably priced and good quality at Lowe's: the National Audubon Supreme Blend. It's ingredients are Black Oil Sunflower, Stripe Sunflower, White Millet, Cracked Corn, Peanut Pieces, and Safflower. Sunflower seeds are very nutritious and attract a large variety of birds. The only difference between black and striped sunflower are the size; the nutrition value is the same. Millet is a small round seed that small seed eaters like juncos and finches as well as larger birds like doves welcome. Safflower seeds are pointed white seeds that are very high in oil content. Cardinals love these, as do other birds with strong seed-cracking beaks (Roth pgs. 46-48). So far, this mix has been very successful for us. And although I do intend to experiment with my own mixes as I get to know the birds a little better, I will probably be sticking with this mix for a little while.

I look forward to continue sharing our adventures as we try out new feeders and foods in the future.

Thursday, April 4, 2013

First adventures in birding


Nuthatch and Downy Woodpecker

Since we put our first pair of bird feeders out on the deck, we have had a lot of excitement. It was late winter when we put them out, and for the longest time, we didn't attract anything. Back when I wrote my first post, we got a pair of chickadees (which my husband saw, but not me because I was putting my son to sleep), but then nothing again. Every day I obsessively looked out the window while I worked in the kitchen or sat at the dining room table. Then came spring, and along with it came the birds. Our feeders, despite the lack of nearby shelter (the nearest tree is about 20 feet away), has become quite the little hotspot. It has been so exciting for us to watch the flurry of feathered friends gather their breakfast as we sit at our dining room table and observe. My son is only 19 months old, and he has been enjoying his early birdwatching experience immensly. Already he has been learning about the birds, and will say "dee dee" when a chickadee comes the feeder, or "coo coo" when we see the doves. He's also learned how to say junco and squirrel. It is almost as fun for me to admire my son's enthusiasm as it is to watch the birds themselves. But, oh, how I do love watching them. We are now able to enjoy leisurely breakfasts and lunches and watch the birds come and go, talking about the things the birds are doing and what kinds of sounds they make. And after my son is finished eating and runs off to play with his recycling truck, I love sipping on my coffee while photographing our visitors. So far, I've been able to snap a photo of all the species we have seen, which I will share with you now.

Black-capped Chickadee


Nuthatch


Mourning Dove


Juncos


Downy Woodpecker


Hairy Woodpecker


Robins


Goldfinch


Cardinal


Tufted Titmouse


And not birds, but visitors nonethless, gray squirrels


In my next post, I plan on telling you about the two kinds of feeders we use now, and the type of seed we selected. So stay tuned, our birding adventure has just begun!